10 easy steps for applying Flooded rear chevron kits to your vehicle
4th April 2023
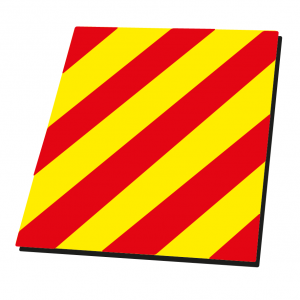
This is our easy step-by-step guide to applying Chapter 8 rear chevrons kits. We will guide you through the process of applying rear chevrons kits with Flooded backing. With flooded kits, you’ll get a yellow backing panel and individual red chevron panels.
Equipment needed:
- Your Chosen kit
- Your vehicle
- Masking tape
- Gripper magnets
- Cloth
- Squeegee
- Surface Cleaner
Watch our video tutorial or follow our step-by-step guide to applying Flooded kits

Step 1
To begin, remove any dirt from the vehicle to ensure a clean surface on which to apply your kit. Wash vehicle with soapy water, dry with a clean cloth and degrease with rubbing alcohol to ensure your vehicle is pristine. We recommend using PVL approved surface cleaners.
Step 2
Then take out your chosen kit. Gather your panels, secure them with magnetic grippers (or masking tape), and align the kit with the vehicle. Make sure the panels have a nice, even gap around them about 5mm.
Step 3
Once you’ve aligned the panels and are satisfied with the gaps around each panel, you are ready to apply the kit to the vehicle. Start with installing the yellow backing panels on the vehicle.
Step 4
Tape down the top of the yellow backing panel and then lift the backing panel to then take off the backing sheet. With a squeegee, apply the backing panel down to the vehicle. Follow the contours of the vehicle when squeegeeing it down and pushing out all of the air bubbles to ensure that the adhesive is applied to the vehicle.
Step 5
Then, you can apply the red panels on top. Use the middle panel as an anchor point during the application process. The anchor point will ensure that the panels are aligned correctly with the vehicle.
Step 6
Tape down or use the magnetic grippers to align the red panels with the vehicle on top of the yellow backing panel.
Step 7
After you have aligned them in the correct position, keep the masking tape down or use the magnetic grippers to hold the panel in place. Remove the backing sheet from each of the red panels.
Step 8
While removing each backing sheet, squeegee each panel into place to ensure that it is stuck onto the vehicle.
Step 9
Follow the contours of the vehicle when squeegeeing each panel. Pushing out all of the air bubbles to ensure that the adhesive is applied to the vehicle.
Step 10
The panels should align correctly, and you should be able to feel the bumps of the red panels as they are placed on top of the yellow backing.
When you’ve applied all of the red panels and wiped away the numbers from each panel, you’ll have a finished Flooded Rear Chevron Kit.
Application for other kits
For applying Self-assembly kits

For self-assembly kits, you must organise your panels into number order beforehand. Then proceed with the application, following the steps of the segmented kits.
For applying Magnetic kits

Please note that if your vehicle is not magnetic/made of plastic, then you are running into the chances of having a magnetic kit you cannot apply to your vehicle.
For applying Segmented kits

A Segmented kit means you will receive the yellow and red panels individually which will have a different installation process compared to the other kits mentioned.
Follow our simple step-by-step guide on how to apply Segmented kits which includes a video tutorial of a real kit being installed
Recap and tips
Always be sure that your vehicle is clean before any application. Be sure that your panels are aligned to the vehicle before you squeegee them into position.
Test your vehicle! – Not all vehicles are magnetic. Use a magnetic gripper or other magnetic items to see if it attaches itself to your vehicle. Or you can knock or tap on your vehicle to see which parts are magnetic or plastic. A hollow sound means it’s plastic, and this is where you can use masking tape to align the kit. This is also helpful for knowing where to use magnetic grippers on your vehicle.
After you’ve completed all of the steps, your vehicle will be all set to go.
If you have any problems after going through this guide, please contact us (via Landline 01444 258980 or Email shop@vehiclechevrons.com) and we will gladly assist you.

